Whether you like it or not, cameras are an integral part of our lives in 2024. They’re on our phones and iPads, in our front porch doorbells, and in the trunks of our cars. The purpose of each application varies greatly, from capturing fun times out with friends to security monitoring at home and office.
 Some of the most memorable experiences in a pilot’s life occur in the cockpit of an airplane, so it only makes sense to bring a camera along to capture the sights and sounds on your flights. From your first solo to landing at your favorite vacation spot with family or capturing the approach lights as you break out from an instrument approach to minimums, you’ll find nearly endless reasons to bring a camera along on your flights.
The easiest and most cost-effective method is to use the video camera built into your iPhone or iPad. While this is a convenient option to record short clips of a unique cloud formation or passing traffic, it’s not very practical for extended use in the cockpit for a variety of reasons:
- It requires pilot attention (a.k.a distraction) to hold the camera, frame the shot start/stop the camera – not ideal for high-workload times
- Videos shot on the iPhone take up a lot of storage space, which is at a premium for many users on their mobile devices
- Quality and stabilization on mobile phones is subpar compared to the latest action cameras
For those reasons, many pilots choose to use a small dedicated camera, like a GoPro. I’ve used many action cameras over the years, from Sony, DJI, Garmin, and others. My opinion on “what’s best” has fluctuated over the last ten years as each manufacturer developed new technologies and released better cameras.
To give a little context, GoPro has been around since 2002 and has developed many iterations of action cameras in the 22 years since. The first few models were well-accepted by sports enthusiasts because they were easy to use and made video recording easy for just about anyone. It didn’t take long for other companies to join in and develop similar action camera models, many with better features and superior video quality over GoPro.
During this period I preferred to use cameras from Garmin and Sony, as their recording quality was superior to the mid-generation GoPros. Fast forward to today, though and the GoPro HERO12 is back in the lead, with better-than-ever features, mobile app integration and the best 4K picture quality on the market.
I’ve used every GoPro model since the HERO2 in 2011, and it’s been fun to watch the evolution of the product. From Cessna 172s and Extra 300s to Cessna Citations and Airbus Helicopters, the GoPro lineup has been used to film a variety of our training videos. More recently, newer models like the HERO11 and HERO12 have allowed us to expand our horizons and create better content for our social media platforms.
Some of the big changes with recently released GoPro models include 5.3K resolution, HDR, log recording, improved stabilization, and our favorite: the 8:7 full-frame recording mode. For the average user, some of these changes won’t matter as much as others, but they can still be of great help.
Getting Started
 Flying with a GoPro means different things to different people, and usage will vary greatly among pilots. One thing hasn’t changed though—ease of use. Once you secure the camera in your preferred spot in the cockpit (or outside on the wing or fuselage), there’s literally nothing else to do besides press the record button. The camera automatically takes care of all the rest, so you can focus on flying and not get distracted by complicated camera controls.
For those looking for a simple answer on how to get going, here is a bare-bones quickstart checklist:
- Charge the battery for two hours before first use
- Buy a memory card (if you don’t already have one)
- Buy a suction cup mount for your interior window
- Download the GoPro Quik app
- Adjust the camera settings
- Resolution: 4K or higher
- FPS: 30fps on higher
- Lens: Wide
- HyperSmooth: On
Of course there are many more customization options related to power, storage, mounting, video settings, audio recording, app integration, and more for those who want to take their system further. Here’s a deep dive into all the options.
Battery Considerations
Like previous-generation cameras, the HERO12 includes a battery with the kit. It will take about two hours to charge an empty battery, so factor in this time before your first use (it’s ok to always leave it on the charger). To charge the battery, insert it into the camera by opening the side access door. Then, use the included USB-C charging cable with any standard USB wall or car charger (your iPhone or iPad charger will work if you don’t have an extra).
 You can expect to get about 1 hour and 15 minutes of recording time (+/- 15 minutes, depending on your settings) on a full charge. To keep the camera recording for longer durations, you have several options:
- Plug the camera into a USB charger or port in your airplane’s panel (make sure you get a longer USB-C cable to accommodate various mounting positions since the one that comes with the GoPro is pretty short)
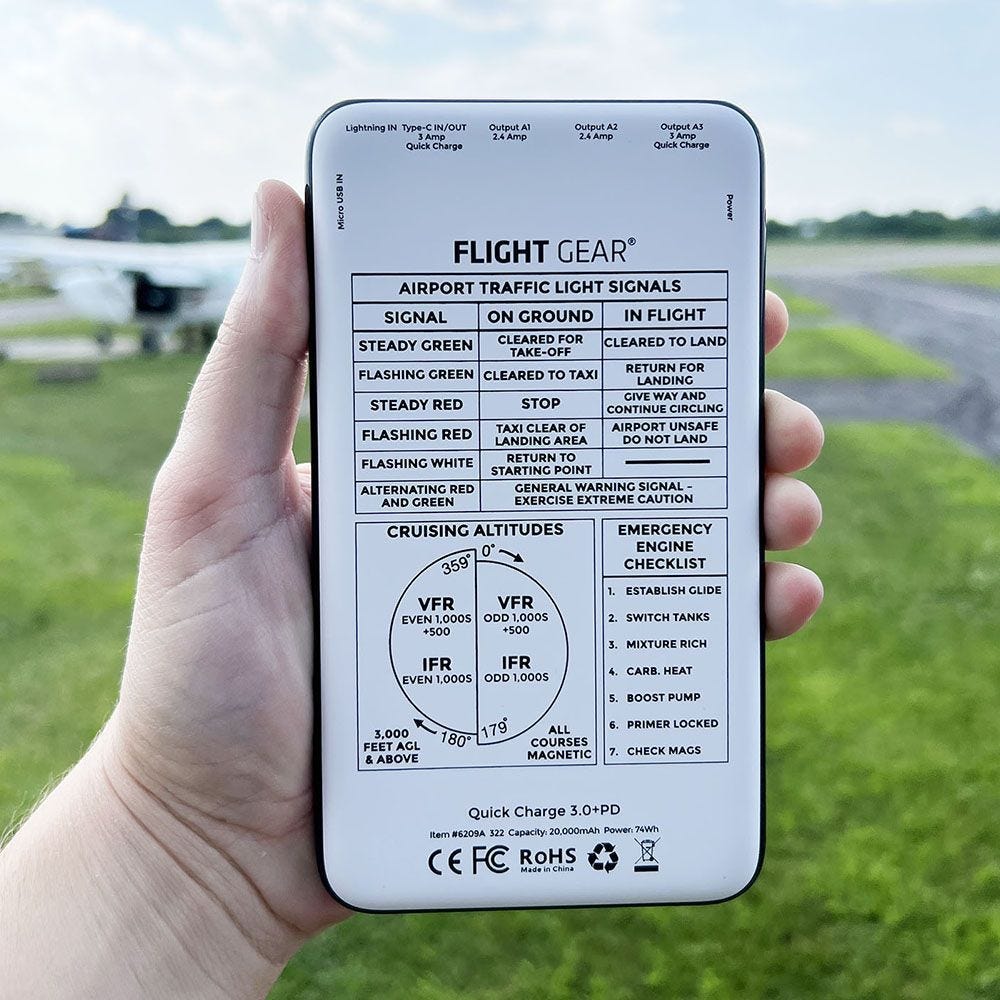
- Bring along a USB battery pack—this model will keep it running all day: Flight Gear Backup Battery (and don’t forget the longer USB-C cable)
- Bring along extra GoPro batteries: HERO12 Enduro Battery
You’ll notice something different about the appearance of the HERO11 and HERO12 battery—it’s white on the end. While it has the exact same dimensions as the battery used in GoPro models of the last few years, it is designed to allow for more endurance in extreme weather conditions. This new battery, known as the Enduro, is advertised for better performance in cold-weather, but it has shown to give us better performance in hot weather as well.
You can still use the HERO9/10 batteries (blue on the end) in the HERO11/12, although you may have slightly decreased performance. With all of the new features in modern GoPros, it isn’t uncommon to run into overheating issues during long flights. The Enduro batteries have allowed us to squeeze some extra performance out of these cameras for our long shoots.
Pro Tip: Buy the GoPro Dual Battery Charger. This includes a second battery and convenient charger, allowing you to keep two batteries fully charged at all times and ready for your next flight.
MicroSD Card
Nearly all GoPro HERO12 kits include a 64GB Sandisk memory card. For most situations, this tends to be just enough storage for all of your content. If you find yourself yearning for more recording time, consider buying another memory card. Here are some of the requirements for that purchase:
- microSDXC
- v30 or higher rating*
- Capacity up to 1TB
* The “v-rating” is a newer classification of speed class for video recording and is the most important consideration when purchasing a memory card. In this case, do not go any lower than a v30 rating when recording 4K or higher resolution video.
GoPro has a list of recommended microSD cards on their website, but we recommend purchasing a card from the SanDisk Extreme series. Newer GoPros have proven to be quite picky about memory cards. The last thing you want to happen during a long shoot is losing all of your footage.
Mounting
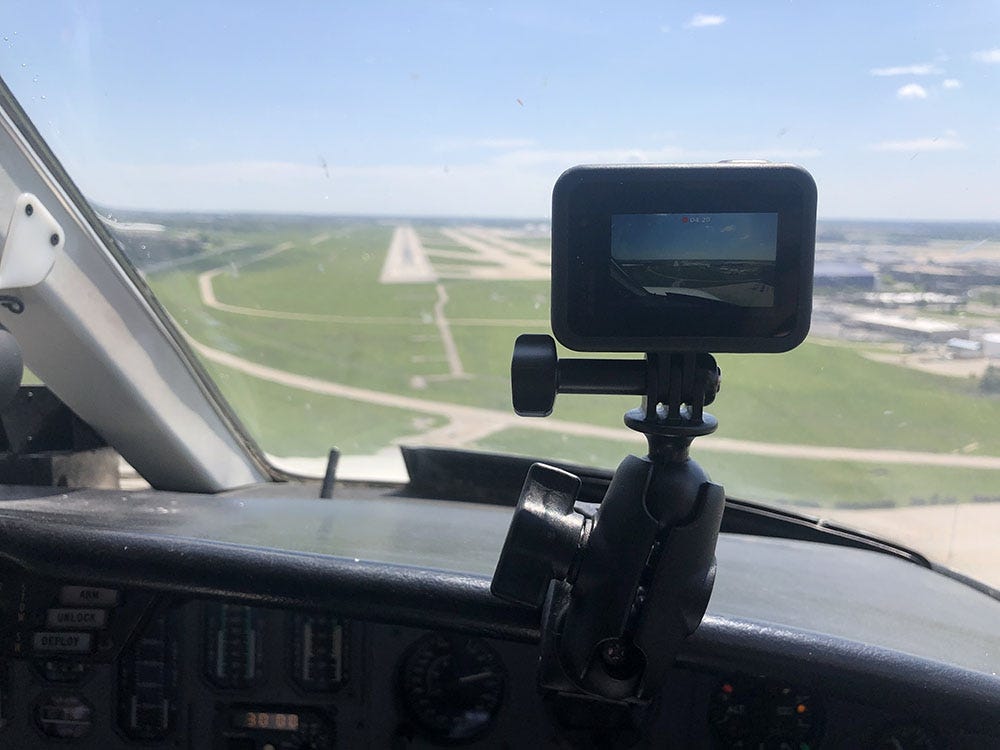
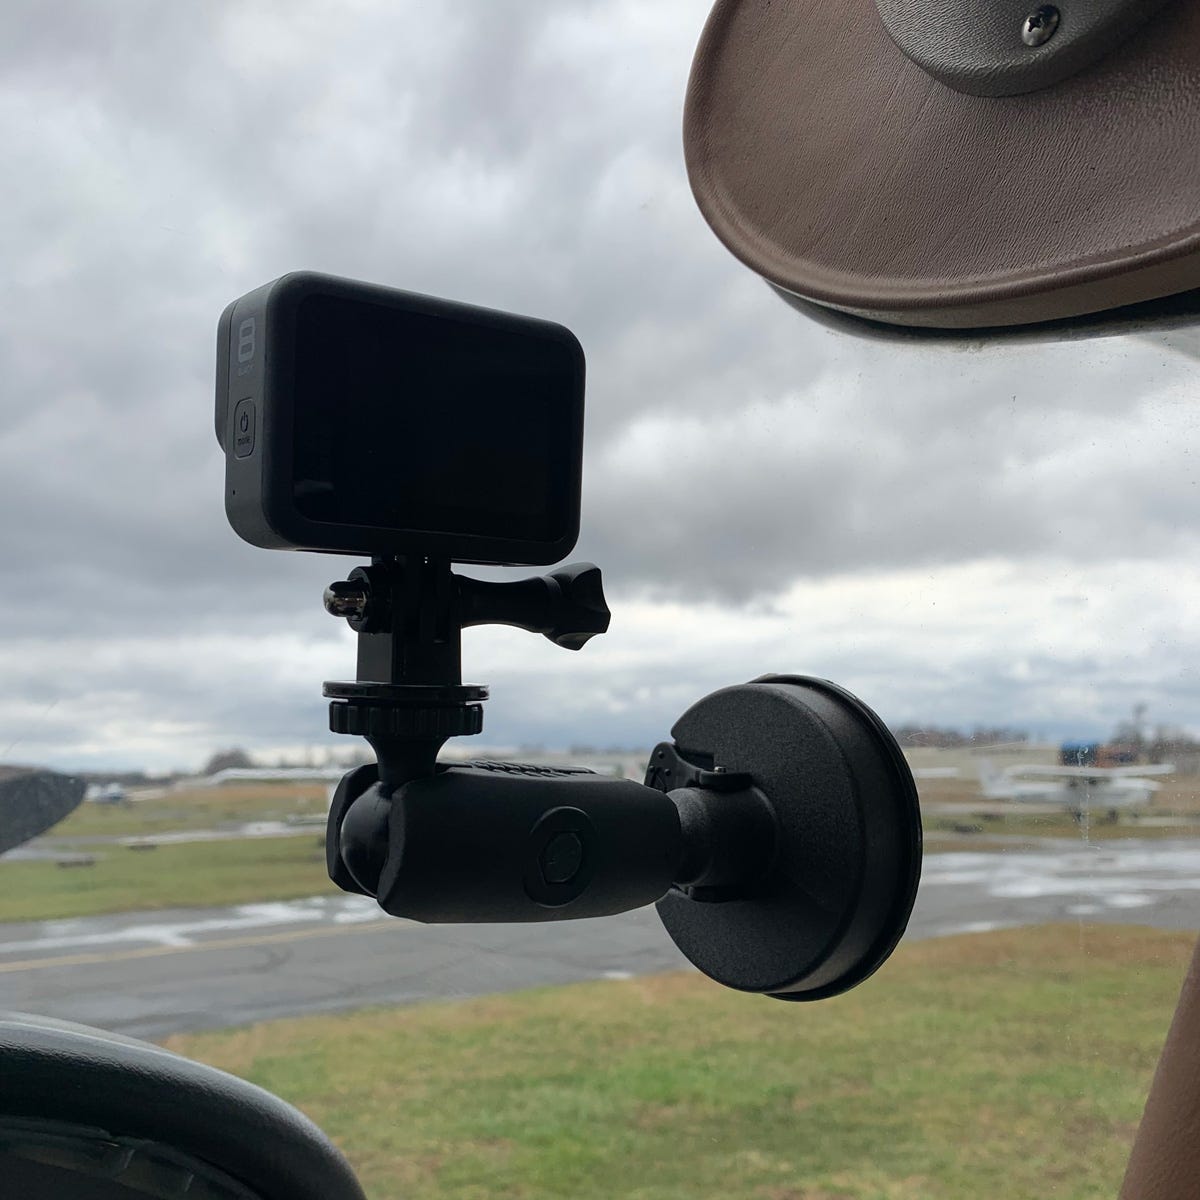
Camera mounting is one area where you’ll want to consider your aviation-specific needs and plan accordingly. The first consideration is to ask yourself: what do you want to shoot? When starting out, most pilots want to capture the view out the front of the airplane, out the side window, and back at them flying. Fortunately, all three angles can be set up with a single suction cup mount, which works very well on plastic windows. While GoPro makes its own suction cup mount, I prefer to use a model that allows for more security and flexibility, like the Robust GoPro Suction Cup Mount. If you prefer RAM mounts, consider the RAM GoPro Suction Mount. Both incorporate dual ball joints, allowing you to rotate and aim the camera in an infinite number of positions.
 If your airplane has exposed support structures in the cockpit, consider using a clamp style mount. I also find the clamp mount useful in larger airplanes with strong glareshields, to shoot directly out the front.
One of the new ways we’ve started using GoPros for content comes in the form of POV video. Using the GoPro Head Strap 2.0, we’ve filmed POV content in a wide variety of aircraft from a Cessna Citation to a P-51 Mustang. This is incredibly easy to set up, although we recommend double-checking the camera’s view with the GoPro Quik app before starting the recording.
As you gain confidence using the GoPro in the cockpit, you may want to consider external mounts to capture dynamic shots of the exterior of the airplane (yes, temporary mounts are legal in the eyes of FAA). There are so many variables here related to airplane configuration and preference that it’s tough to give a one-size-fits-all option like interior mounts, but here are popular mounting accessory options.
- External mount with ball joint: can be used anywhere you can find a #6, #8, #10 screw or AN4 bolt (I typically consult with an A&P when using this mount). For example, on a Cessna 172, this mount is useful under the wingtip to capture the side profile of the airplane.
- Strut mount: a great option for high-wing Cessna airplanes
- Tie down mount: easily secure the camera on the bottom of the airplane looking forward
- Adhesive mount: this is by far the easiest option if you own your airplane, but choose your location wisely and consider it a semi-permanent fixture. I’ve used this basic mount with Patty Wagstaff on the wing of her Extra 300 and it (and the camera) will stay securely in place through high-speed and high-G maneuvers.
Pro Tip: Once you purchase a suction cup mount (either the Robust or RAM type), you can easily add another attachment using the ball joint to switch to additional fixtures. I suggest keeping a suction cup and clamp mount in your flight bag for flexibility.
Using the GoPro Quik App
You’ll want to download the free GoPro Quik App for your iPhone, iPad or Android device when using the HERO12. Not only can you adjust all camera settings and preferences from the app, it’ll serve as a real-time viewfinder to help frame your shots. Like with the camera itself, this app has come a long way from the early versions and is very reliable now. You can also use it to manage your video files and make basic edits.
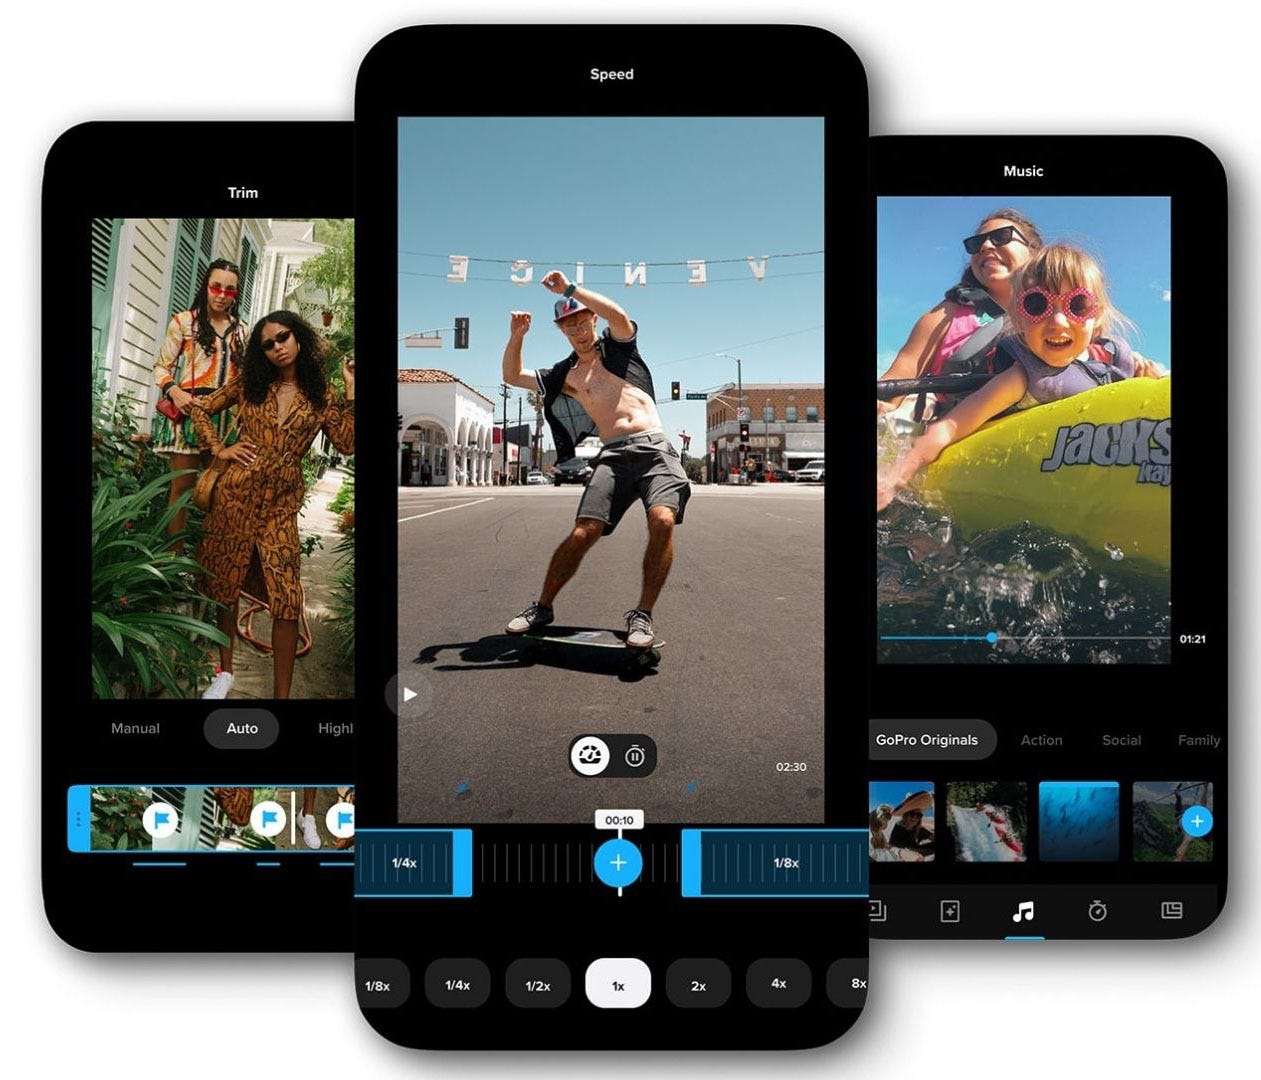 GoPro also significantly improved its computer software for editing your footage on either a Mac, so make sure to download that free program as well.
Pro Tip: The one area where I’ve experienced some reliability issues with all GoPro models (including the HERO12) is starting and stopping the camera recording with the app. For this reason, I try to always use the physical start/stop button on the camera and make sure the beeps are set as loud as possible for aural feedback.
Camera Settings
While the camera is completely automated when it comes to exposure, focus, etc., there are some settings you may want to tweak to refine your shot further:
- Resolution: I prefer to shoot everything now at 4K resolution or higher, to capture the most detail possible. You can, however, choose to record at a lower resolution like 1080p. Why go lower? It’ll allow you to capture nearly twice as much footage compared to 4K or higher on a memory card, and you’ll find the footage is easier to edit and work with if you don’t have a powerful computer.
- FPS: This stands for Frames Per Second, and 30 or 60 seem to be the standard value here for most video. 30fps will suffice for most video, while 60 tends to provide smoother motion, albeit at the cost of higher camera temperatures and more storage used. Selecting 120 or 240 is often used for slow motion since it allows you to re-time the footage later for a slow-mo effect. While this is fun to use with action sports and other activities, I haven’t found much use for it in the cockpit.
- Aspect Ratio: This refers to the relative shape of a video. Most content viewed on YouTube is displayed in a 16:9 format, a relatively normal widescreen ratio. Most content viewed on mobile platforms is displayed in a 9:16 format, displayed very tall rather than wide. This is where the new 8:7 full-frame aspect ratio that debuted on the HERO11 comes into the equation. Shooting in 8:7 still allows you to film up to 5.3K/30fps, but also gives you the option of cropping it down in editing to fit either a mobile screen or a computer screen. This has proven to be an incredibly useful option for us as we expand our social media video productions.
- Lens: Depending on which aspect ratio you choose, there will be a variety of lens options. Each one determines how large your field-of-view will be. Generally, we stick with the Wide option to avoid excessive distortion on the edges of the frame, but you can use SuperView or HyperView to obtain an incredibly large field-of-view.
- Hypersmooth: I prefer to leave this setting on all the time, as it uses overscan and digital processing to remove even the harshest engine or turbulence-induced vibration. You will see the recorded video slowly bounce around the frame, but this adds to the realism. It’s worth experimenting with it off for a few shots to appreciate the difference it makes in the airplane
Pro Tip: Set up presets for camera settings if you change them frequently. For example, you might want to create a 4K wide lens preset for shooting out the front, and a separate 4K superview lens preset for shooting in the cockpit. This makes it easy to quickly switch in the airplane without having to reconfigure individual settings each time.
Cockpit Audio
 Like previous models, the GoPro HERO12 includes an internal microphone to capture ambient audio. Many pilots prefer to tap into the intercom to record cockpit and ATC audio, to help tell a better story with their video. To do this, you’ll first need the appropriate audio adapter, which will connect from the headset jack to the USB-C port on the camera:
- Airplane (standard PJ jack)
- Airplane (LEMO jack)
- Helicopter (U174 jack)
To use them, you simply remove the protective door on the GoPro, plug it in, and start recording. The HERO12 will automatically see the external input and pull audio from that source.
GoPro also offers a Media Mod accessory that extends the USB-C port to an exterior location on the frame. It also includes a higher-quality directional microphone, HDMI port (for playback on a TV), and 3.5mm mic port for other audio recordings.
Pro Tip: The input/output settings in the Preferences menu provide fine control over audio input settings. You’ll want to test your particular airplane audio panel to make sure it's recording properly using the trial-and-error method with the various mic options. Read more here.
Prop Filter
For years I’ve recommended using a prop filter with any action camera to reduce the distracting effects of propeller distortion when shooting out the front of the airplane. This was always a tradeoff, as it was designed to trick the camera into automatically adjusting the shutter speed, but the downside was often a darker shot with less detail, more muted color, and added graininess.
With my experience using the HERO12, though, this is really no longer needed, thanks to improvements with the camera sensor. You may see a little propeller distortion compared to shooting with a higher-end camera, but in my opinion, the better picture quality achieved by not using it is worth the tradeoff.
Editing
Through a subscription, GoPro offers editing tools in their Quik app, allowing you to edit all of your footage through your tablet or mobile device. We understand using software like Adobe Premiere Pro or Final Cut Pro may not be everyone, but here are some tips if you plan on doing some editing.
For YouTube videos, make sure your aspect ratio is set to 16:9. Other aspect ratios will work, but this will lead to black bars on the sides of the image. It’s always recommended that no matter how you export, you always use the highest quality possible. If you shoot in 4K, try to export in 4K.
For social media posts, make sure your aspect ratio is set to 9:16. This is where recording in the 8:7 full-frame mode comes in handy, as you will be cropping the video down. You can use the original aspect ratio for uploads, but this doesn’t always look good on mobile devices as it does not fill the entire screen.
Should I upgrade?
There has never been a better time to invest in a camera for the cockpit, thanks to the advances in design, technology and 5.3K picture quality with the HERO12. If you currently use a GoPro HERO7 or older and actively use your camera in the cockpit, consider upgrading to the latest model. You’ll be blown away with the improvements in picture quality, hypersmooth stabilization, and more reliable experience with the GoPro app.
Shop all cameras and accessories >>