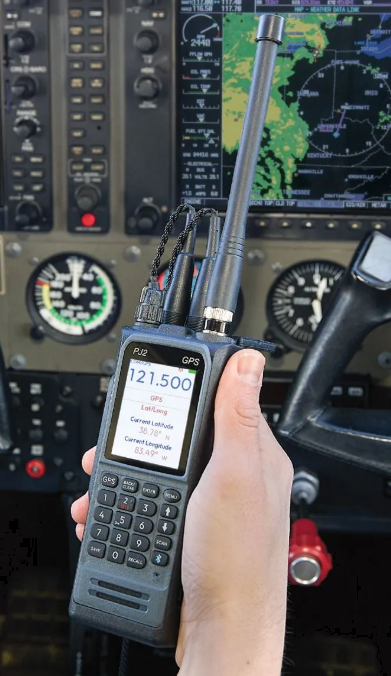
The PJ2 GPS isn't just a backup radio; it’s a powerful situational awareness tool designed for simplicity when you need it most. Let’s jump in and look at how to set up the GPS portion of this radio.
Getting Started with the Initial Fix
Before you can use any GPS features, the radio needs to "see" the sky so it can find its location. The initial location fix must be done outside with a clear view of satellites, so go outside. The first time you power on, it may take several minutes to acquire a signal. Once successful, the screen will change from "COM" to **"COM/GPS"** in the upper left corner. You’ll also see GPS data populate on the screen.
Saving Waypoints
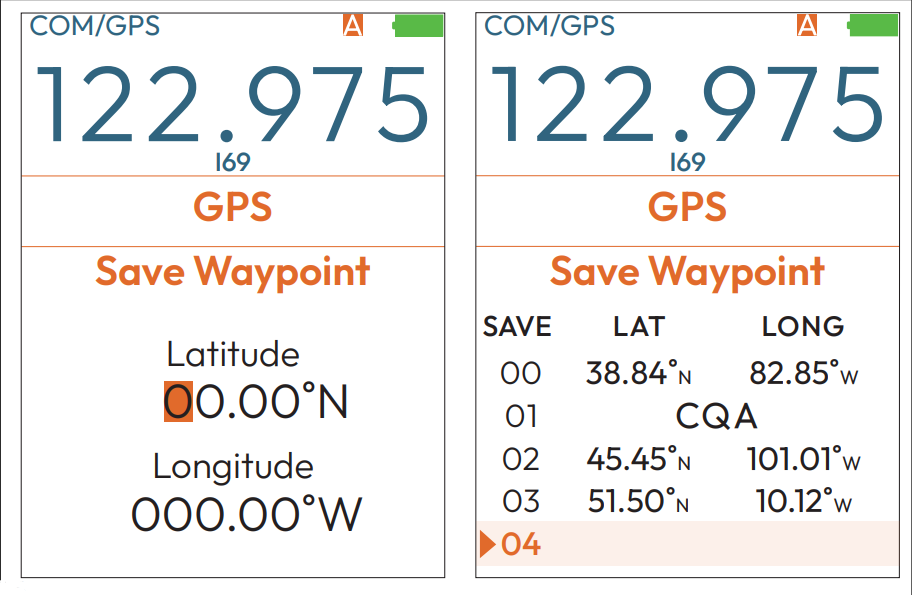
The PJ2 GPS can store up to 100 waypoints. There are two ways to save a location:
1. Current Location: The quickest method. Press MENU > GPS > Save Waypoint > Current Location to save your exact coordinates as a waypoint
2. Manual Input: Press MENU > GPS > Save Waypoint > Lat/Long Input to enter coordinates one digit at a time using the keypad. The easiest way to find the coordinates of an airport is on the airport data page of your favorite navigation app, like ForeFlight or Garmin Pilot. Note that the Lat/Long is in decimal format, not Hours:Minutes:Seconds format.
Since a list of coordinates can be confusing, you can add a 3-character name (like "KLAX" or "HOME") to any waypoint via the Name Waypoint menu.
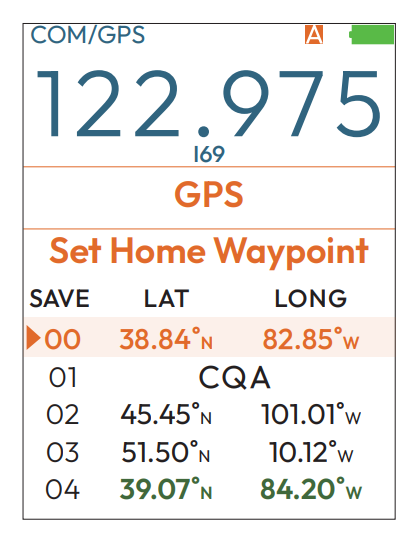
Set the Home Waypoint & Emergency Mode
The most important waypoint on your PJ2 GPS is the Home Waypoint. This serves as your Panic Button destination. When you hold down the #2 key for 3 seconds, Emergency Mode will be activated, and the PJ2 GPS will begin navigation to your home airport. To set your home airport, you must first save your home location as a waypoint (see above). Most pilots will set the home airport in the first available location on the waypoint list.
To assign a waypoint as your home, go to MENU > GPS > Set Home Waypoint and select a previously saved location. Hit the enter key. It will appear green in your list once it is successfully set.
When emergency mode is activated, the radio automatically tunes to 121.5, displays your current Lat/Long for search and rescue, and provides a direct Track, Bearing, and distance to your Home Waypoint. Turn the aircraft to make your track and bearing match, then watch the distance tick down as you fly home.
Magnetic Variation
The PJ2 GPS uses True North for calculating track. This means the track readout might not match your navigation app or compass. To input your magnetic variation, use MENU > GPS > Input Mag Vari
Understanding the GPS Display
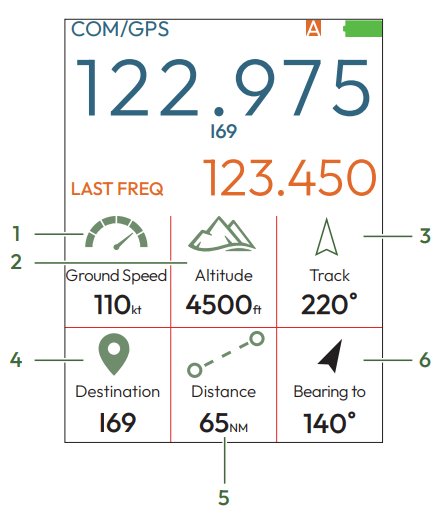
When navigating to a waypoint, the screen provides six key pieces of data:
1) Groundspeed: Your speed over the ground in knots
2) GPS Altitude: Your height above sea level (not barometrically corrected)
3) Track: The actual path you are moving over the ground
4) Waypoint/Destination: If the waypoint is named, the name will appear here. If it is not named, the lat/long of the waypoint is displayed.
5) Distance: How many nautical miles (NM) remain to your waypoint
6) Bearing: The compass direction you *should* be flying to reach the waypoint